Showing posts with label quilt. Show all posts
Sunday, August 28, 2011

Two heads are better than one...finally finished and hung


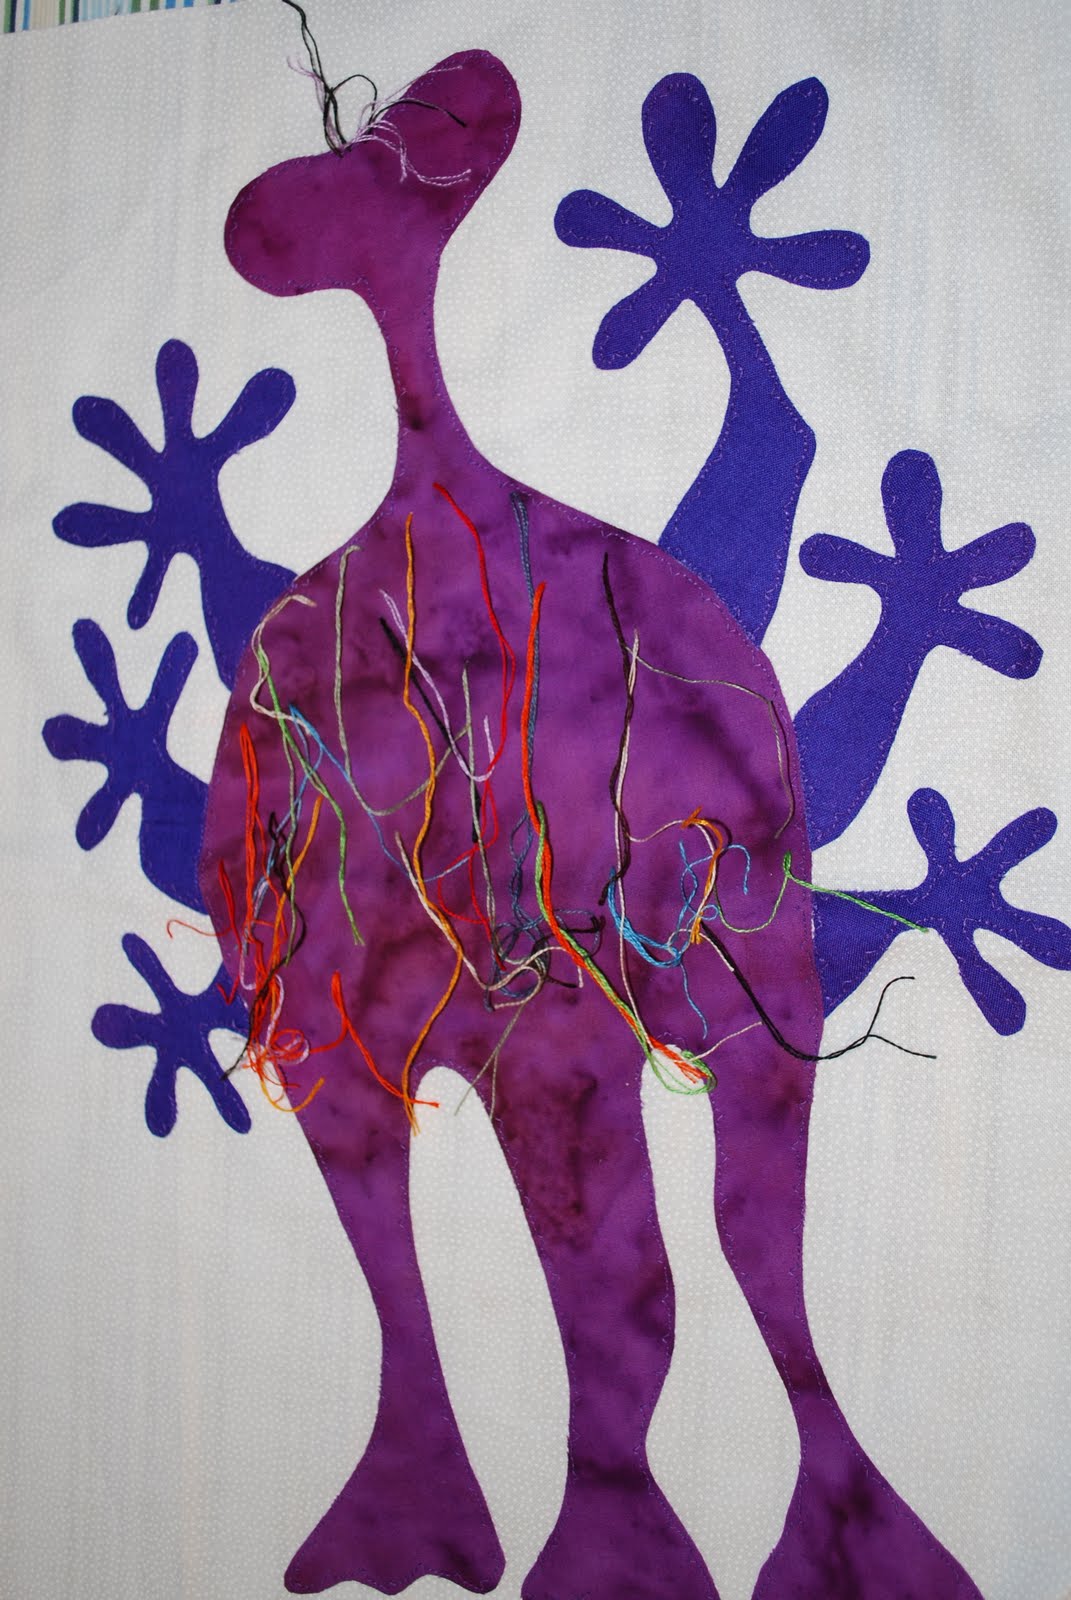
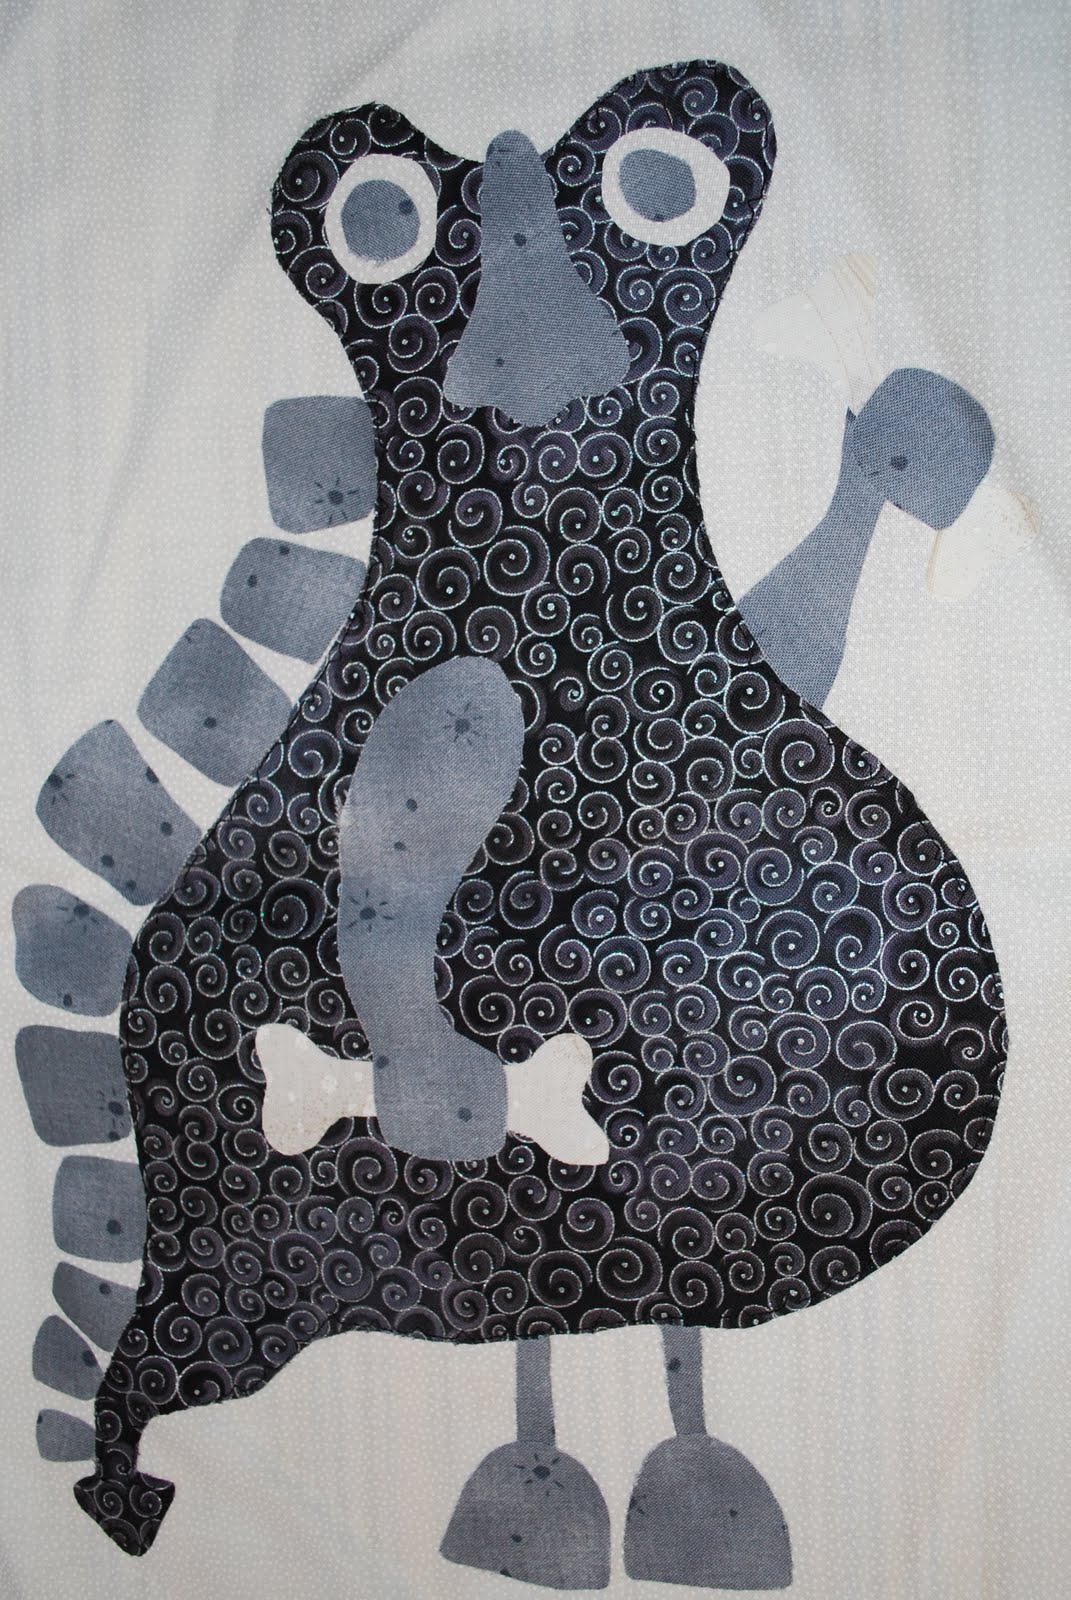
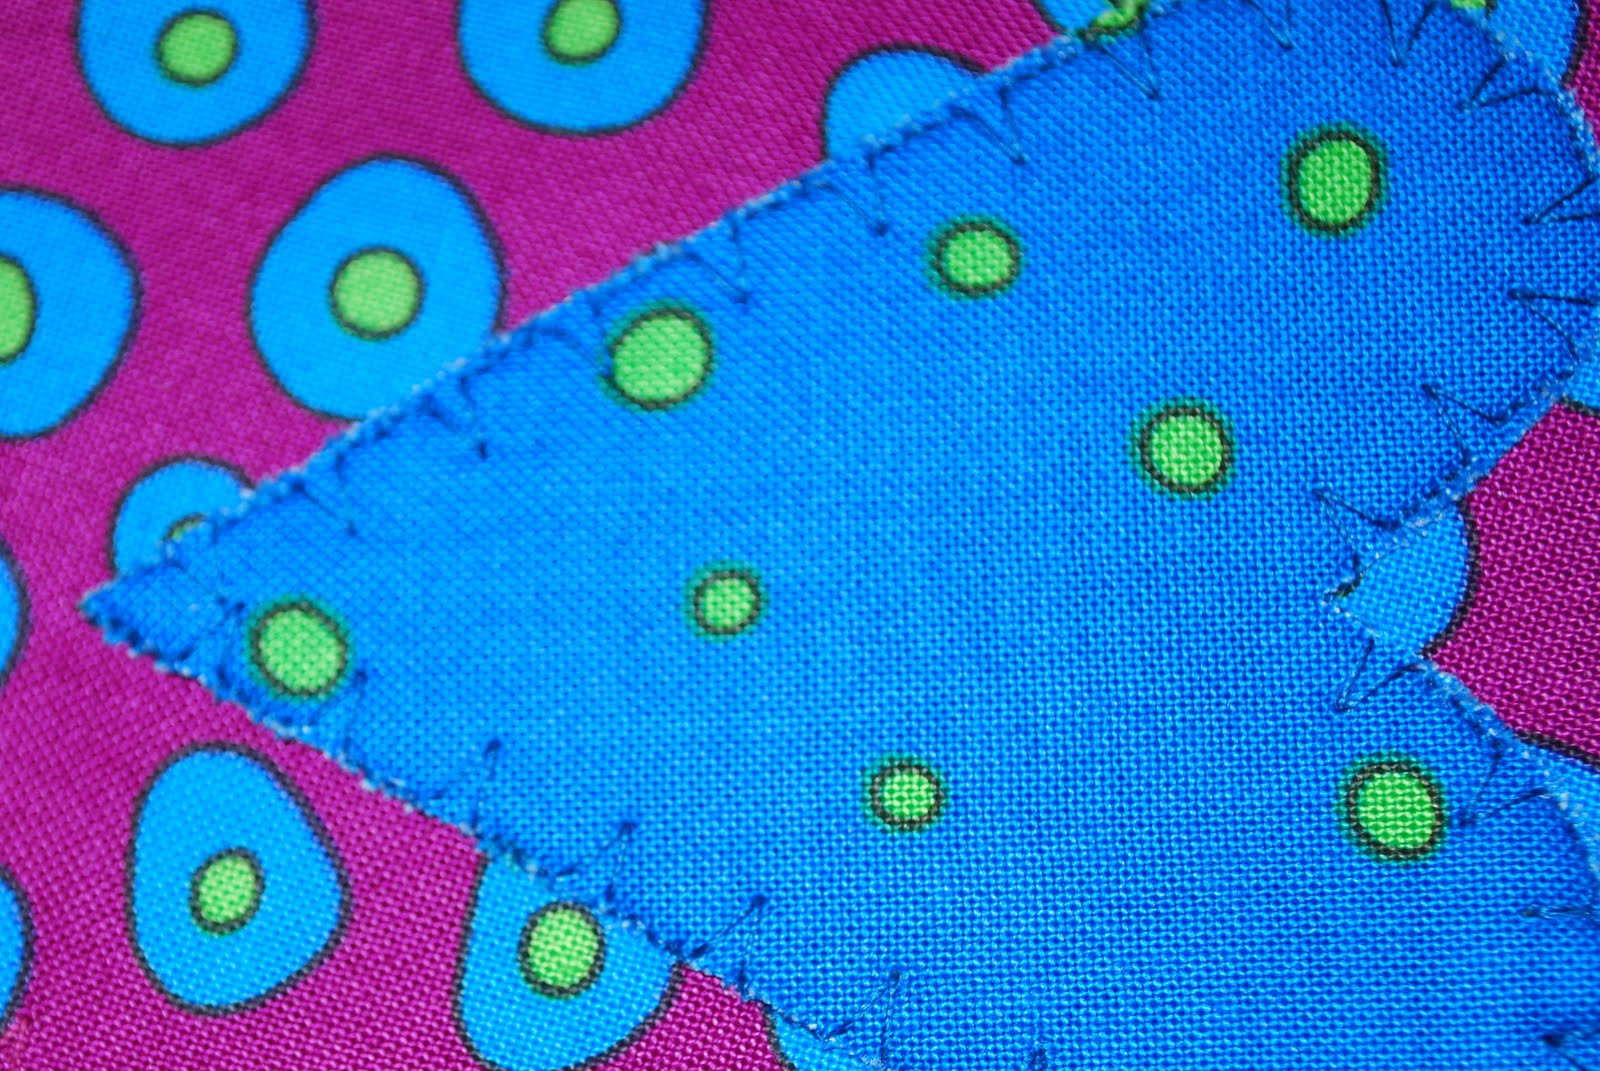
A while back, I made the "two heads are better than one" wall hanging quilt from Whip up! Mini quilts. Having issues with my machine led it to sit gathering dust, until I got my new machine and quilted it. After finishing the art quilt for the swap, I realized binding wasn't that hard (ha!) and proceeded to finish this quilt. The binding did not go so well this time! First, I used my bias tape foot for 1/2" binding. That ended up being too small, so I made 3/4" binding by hand (just pressing it with my iron). It ended up being a bit wonky, but I stitched it on anyway. It ended up being way small on the front (I didn't adjust my seam allowance for the larger binding) and so then is huge on the back. Oh well, you don't see that! A solid color binding may have been a better choice as well.
I sewed on a sleeve, and my handy husband cut a dowel rod to fit and nailed it to the wall (the rod, not the quilt)
Another bummer, I realized the 2 different whites I used in the skull are actually 2 different shades. Good thing my son is only 2 and doesn't care =)

Currently, I'm working on compiling resources to start a very loose type of play based homeschooling with my 2 year old (soon to be 3). Pinterest is so amazing for this. I have found so many good resources.
Tuesday, August 23, 2011

First art quilt


I belong to a wonderful swap group, where we swap items for nature tables, made from natural materials (ie no acrylic felt or yarn, instead cotton or wool is used). Recently, they deviated and had a 1 on 1 swap (usually it's a group thing) for wall hangings. I was paired with a mama who does felted wool things, so I'm really excited to see what I get.
I've been working (for a lot longer than I expected, actually) on this quilt and it's finally done, with the exception of adding a hanging sleeve. I didn't know you were supposed to add them before the binding. Whoops!
It was my first attempt at free motion quilting, which is a lot, lot harder than I thought it would be. Since my skills were not so great, I used matching thread in the needle and bobbin, instead of using thread in the bobbin that matched the backing fabric. This way, mistakes on the front would be less noticeable. As it's intended to be a wall hanging, I think it's ok that all my stitches are obvious on the back.

I really hope she likes it-and if she doesn't, I'm asking her to return it to me, because I LOVE it.

What do you think? Too plain? Not sewn well enough? AMAZING? (Please pick the last! LOL)


Thursday, May 26, 2011

Month 9 block-the final one


I'd tell you the name of this block, but I've misplaced the instruction sheet. I love the silver foil for the pitchfork, but still need matching thread to applique it down. I imagined the fabric choices working out differently, but not too shabby. This is the final block! I've been working on making the squares that coordinate with each month as I go along. I'll post more as it's completed.
Wednesday, May 25, 2011

Month 8 block


Month 8, Mister Big Mouth, is another favorite. The fabric choices make me think of watermelon. He was one that was a bit annoying to put together, with the scales on his back, and the toenails, but I think he's very cheerful.
Tuesday, May 24, 2011

Month 7 block


The Green machine (or red/orange machine for the colors I chose) is one of my favorites. I love the fabric choices, and he is just really neat. I'm not looking forward to sewing on all his individual teeth, however! The scales on his back were annoying enough.
Sunday, May 22, 2011

Month 6 block


For month 6, we have Mister Chompers. Alas, Mr. C is in need of a redo. I attempted a new way to applique the antennae (a small zigzag/satin stitch), determined it looked horrible, and in my stitch removal got a little carried away. It left a hole in the white background fabric. I have left him, because it made me mad. I need to decide if I should start over from scratch, or attempt to darn the hole, remove the other antenna without issue, and re-sew them.
Friday, May 20, 2011

Month 5 block


This month's block is the Hairy Monster. He's still missing his eyes, and needs a lot more "hair". It takes a lot longer than you would think to make it all! The hair is made up of a couple of strands of embroidery floss knotted in the back. My mom came up with a clever idea to make it quicker, so I hope that will speed things along.
Monster quilt sew along with my mom
Thursday, May 19, 2011

Month 4 block


Month 4 is the Dragon madam. For some reason, this is one of my least favorites, as far as color/fabric choices go.
Monster quilt sew along with my mom
Wednesday, May 18, 2011

Month 2 block


I completely forgot about posting my blocks! None are completely finished, as I still need to add in the small pieces, like the eyes. However, you can get a look at the colors I picked! It's coming along nicely. Month 2 is Mister Bones.
Monster quilt sew along with my mom
Sunday, May 1, 2011

Two heads are better than one


If you guessed it was a skull, you're right! It's the "Two heads are better than one" wall hanging quilt from Whip up! Mini Quilts. Holy cow, did it take forever to cut out the pieces! I also forgot I only wanted to make one, and the pattern makes 2 mirror image wall hangings...so I cut out twice as much fabric as I needed. Once I had it cut out, I had several mistakes, as I was using different colors than the pattern calls for. Once I wrote the colors onto the pattern, it was pretty quick and easy to sew together. Now I need to buy some batting if I want to put it in, bind it and quilt it!
Saturday, April 30, 2011

Last one!


Sneak peek number 4. This didn't turn out as well as the others.
Friday, February 25, 2011

Month 3 applique for monster quilt


I have finished the month 1 monster (except for the small bits-I'm waiting for my mom to come and help me with those) and just finished the month 3 monster. I don't have a fancy machine (in fact, it's one of the cheapest, most basic ones. I'll have a great one someday!) and so I don't have the blanket or applique stitch. After asking around a few places, it was down to using the blind hem stitch or a simple zigzag. I did a lot of experimenting, and chose the blind hem as it's most similar to the blanket stitch (instead of a zig or "arrow" going in, it's a straight, closed stitch) My settings are just over 1 for stitch length and a little over 3 on the size of zigzag.

The biggest tip is to go slowly, and turn it by hand around the tight spots. I'm not perfect, but I am slowly improving on each piece I applique. Here's a close up of the heart so you can see what my stitch looks like.


As I work on each monster, I keep a ziploc bag handy, and keep all the little bits, fabric, pattern, etc. inside so I don't lose anything or get it confused. Simple idea, I'm sure, but one I'm happy to have thought of, as I tend to lose things and am very disorganized.

Sunday, February 6, 2011

Prepping applique pieces for a quilt

I'm going to document some of the steps in making up quilt blocks. I've never done it before, and my mom is coaching me over the phone and via webcam.

Once you have your fabric, pattern, and thread, you'll want to get this awesome stuff called "Wonder under". It's fusible on both sides and has a paper backing.

Trace your pattern (using a sunny window or a lightbox) onto the paper backing of the Wonder under. Here's the key-you have to turn your pattern so the back of the paper is facing you. You want to end up with your pattern looking exactly like it does, not a mirror image. I messed this up on the first monster, but in this case, it doesn't matter-he is just flipped the other way. In other quilts, this can be a big mistake! So flip your pattern over, lay the wonder under on top and trace onto the paper backing.

Now cut out your pieces, but don't bother cutting along the lines-once you add it to your fabric, you'll be cutting again, so just make rough cuts. Another big reminder-iron your wonder under pattern piece onto the wrong side of your fabric. Yep, I made that mistake too, and ironed it to the front.
Don't do this!

Once you have done this, your fabric piece will be unusable and you'll have to retrace the pattern piece onto a new piece of wonder under.

Do this!


So, iron your pattern pieces onto the wrong side of the fabric. Lift and place your iron-don't drag it! Leave it on each section for around 8 seconds. Cut out your pieces along the lines, and there you go! You have your applique pieces ready to go.
Mine aren't completely ready because I need some white for eyes and red for mouths, but you get the idea.

Month 1 Monster


Month 3 Monster
Friday, January 28, 2011

Sackboy


Any other fans of Little Big Planet out there? In honor of Little Big Planet 2 coming out, I made Zboy a Sackboy. He loves to watch the game and even plays it (though not well-come on, he's only 2!) I need to get a better picture of him. Zboy loves him, and especially loves the big, wobbly head. The pattern is here if anyone else is interested. I need some black yarn to redo his eyes and give him a mouth. I didn't want to use button eyes as Zgirl gets a hold of everything anymore, and buttons + baby=bad news.


I got my parts in the mail for the block of the month quilt I'm doing with my mom. She picked this month's fabrics. I'm doing the first monster, "Star monster", in blues.
Sunday, January 16, 2011

Monster quilt block of the month sew along

My mom bought the pattern for this quilt a while ago, and while she lives in Ohio, and I live in North Carolina, we are going to have our own block of the month club! We are taking turns picking fabric for the blocks, and trying to do one a month. The exception is the first two blocks-the goal is to have them done by the end of February. It's an adorable quilt (Monster quilt designed by Sue Garman) We are using a different phrase than the one that is originally with it (something about monsters eating fabric and buying more stash-not appropriate for a kid's quilt IMO)

So stay tuned!

What I'm working on now-a set of robot jammies for Zboy for the Monthly Make and Play Carnival. This month's theme is "cuddle up", and how better to do that than in some cozy new pj's? (especially when you're a kid who refuses to change into regular clothes!)
 

Blog Template by YummyLolly.com